The Creative Process – Table of Contents
The below may seem complex, but every part is modular. Use only what serves your own rhythm. The sheer number of moving parts could make you think, “I could never do this.” The reality is the opposite: this pipeline is the reason an overwhelmed parent with a full-time job can produce polished work at all (that’s me… you too?).
1. Capturing the Spark
A spark rarely announces itself. It shows up while you marvel at a flower, stare at the sky, wait for a bus, or sit on the toilet wondering about life. It’s that small mental flick that tickles your curiosity for no clear reason. The point isn’t to interpret it or shape it into something profound. The point is to intercept it before it evaporates. I use the Notes app on my iPhone because it’s always there, but anything works: paper, a notebook, a voice memo, a napkin. What matters is immediacy. Wherever you are, if something stirs, jot down a line or two or ten until the pulse of the idea is caught. No planning, no coherence, no pressure. Capture it and move on with your day.
2. The Morning Draft
Usually I’ve noticed that waking early—five or six in the morning, sometimes straight out of a dream—creates a strange clarity. A spark shows up, or I revisit one I captured earlier, and it starts unfolding on its own. Early mornings work for me because the mind feels freshly rinsed. Whatever the brain does during deep sleep and REM, it leaves me open, unguarded, and free of the daily static that usually smothers creative impulse. I don’t do this every day—maybe once or twice a week—but when it happens, I grab my phone’s Notes app, scroll through recent sparks, and slip into a fifteen-minute thumb-hammering frenzy where none of it has to make much sense. It’s pure flow. If your creative window shows up at night or sneaks in between meetings, use that instead. The timing isn’t the point; the looseness is. You’ll know when your thumbs get tired or the spark feels spent. I never push for more than what wants to come out.
3. Iterative Conversation and Expansion with ChatGPT
Any spark that grows into a few hundred words becomes the ember I bring into the next step: flushing it through AI, no turds intended. Use whatever model you prefer. I usually start with ChatGPT for the initial back-and-forth. I paste the raw ember in verbatim and give it no instructions. I want to see its first ‘instinctive’ response. That reply often opens a path—new angles, unexpected framings, or contradictions I hadn’t noticed. I follow those threads in dialogue, letting the draft twist and stretch until the idea feels fully exposed. There are no intricate steps, just two minds talking: one physically sitting in front of the screen, and an artificial one trained on the aggregate output of what humanity has pushed online.
For the record, I’m not pretending the AI is a conscious partner. It’s a tool. Federico Faggin’s book Irreducible makes a compelling case for why artificial systems won’t replace the human impulse to discover anything truly new. That said, these models are excellent mirrors, and they reveal the shape of my thinking faster than I could alone. An hour-long YouTube video with Federico being interviewed by Hans Busstra from the Essentia Foundation is available here: https://www.youtube.com/watch?v=0FUFewGHLLg
Once this initial conversation feels exhausted—when the model starts repeating itself or I feel the idea has nowhere else to go—I take the entire exchange and move it over to Claude.ai for the structural rewrite (literally copying and pasting the entire wall of text).
4. Claude.ai chat and the Substack pass
Pasting the conversation with ChatGPT into Claude.ai—again with no instructions—usually produces a first response that opens up additional angles or exposes arguments worth tightening. That reply often nudges me to explain certain parts of my thinking more clearly or explore nuances I hadn’t articulated. Another round of back-and-forth follows, for however long the idea still has room to move.
Once that conversation nears exhaustion, I give Claude the following exact prompt:
“Please rewrite this conversation into a Substack-optimized post. Begin with a captivating hook that grabs attention immediately. Build the piece with a layered, fascinating structure that sustains engagement through to the close. Avoid generic or mechanical phrasing that would reveal AI origins—infuse the draft with distinctive voice, rhythm, and nuance. Incorporate contextual references or annotations that tie ideas back to thoughts, themes, or arguments across related writings. These should act as subtle connective tissue—footnotes, parenthetical asides, or narrative callbacks—that create continuity and intellectual depth. After producing the draft, evaluate it on ten arbitrarily chosen scales (0–10) such as: 1. Originality of voice 2. Clarity of argument 3. Structural intrigue 4. Emotional resonance 5. Integration of contextual references, and so on. Provide your draft as artifact.”
Claude’s output—ranking included or not—becomes the first genuine draft. This is the moment when the initial spark has grown into something with shape, texture, and substance. It’s simmered and partially refined, and there’s already a surprising amount of meat on the bone. But because the evaluation usually reveals a few scores below perfect, the next move is simple—I ask Claude: “Now aim for perfect 10s across the board.”
This draft I may then already stage on Substack and let it rest there for a little while.
5. The Synchronicity Window and initial Google Notebook LM podcast
Leaving a draft alone for a few days creates what I call the synchronicity window. During this pause, I tend to notice small coincidences: thoughts, conversations, or everyday moments that feel connected to whatever I’ve been writing about. Sometimes it’s simply YouTube recommending a video that echoes the same theme. Whether it’s heightened attention or algorithmic luck doesn’t matter—the effect is the same. These small alignments help clarify what the piece is really about and often nudge the next round of refinement, if necessary.
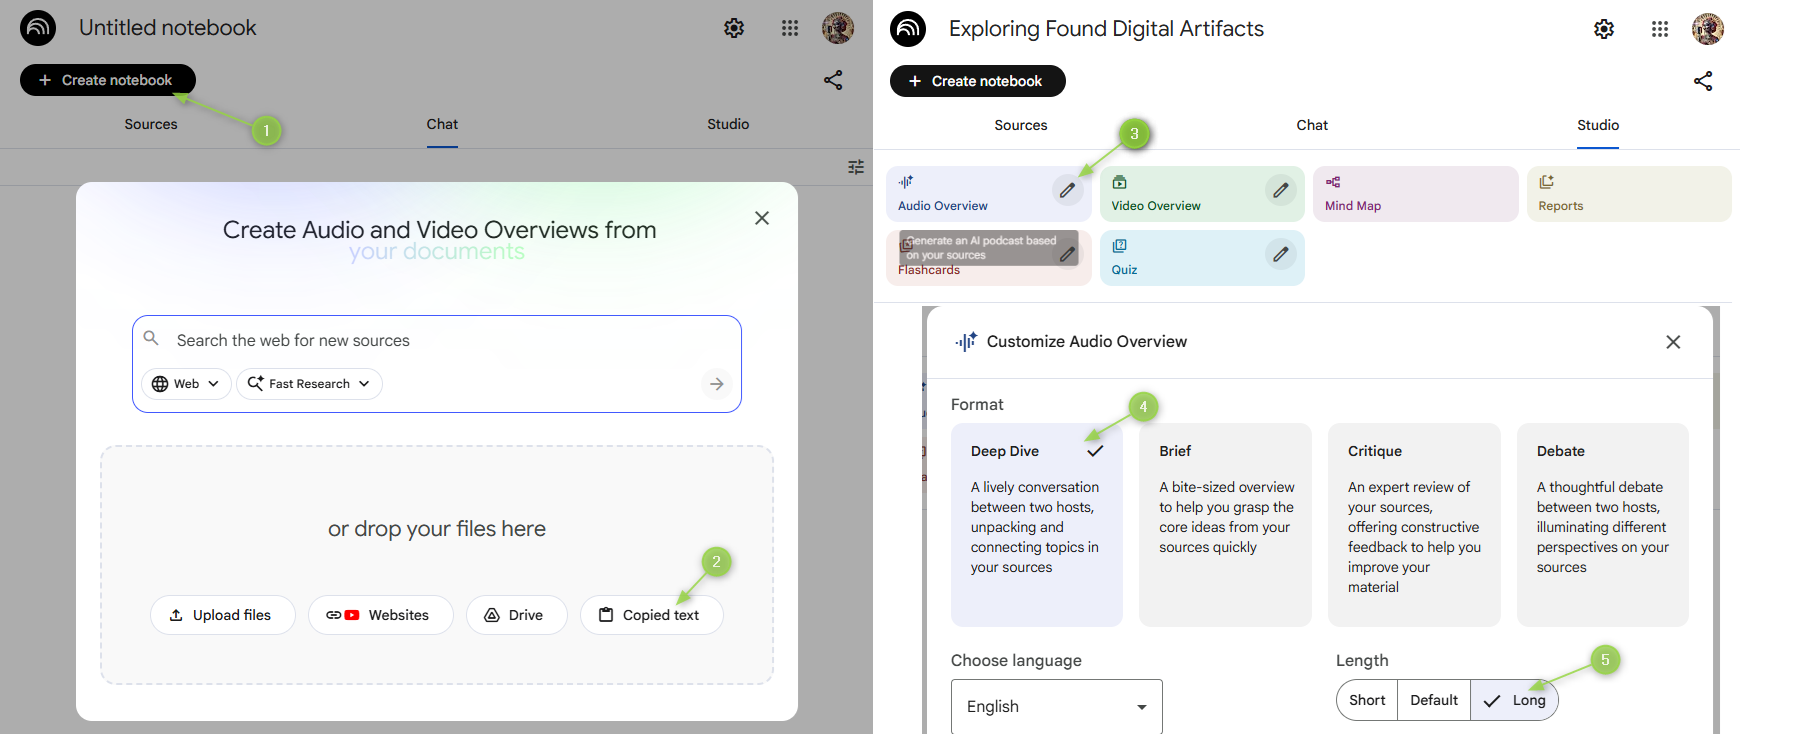
Podcast: KindredSoulSearch.com (KiSS) offers AI-generated podcast episodes for most posts, and Substack also supports uploading audio files. I create these episodes using Google NotebookLM (https://notebooklm.google/). I simply paste the full draft of the blog post into NotebookLM as the source document and let it generate an audio deep dive of the piece, and I prefer the Long version shown as a setting below (step 5):
These podcast versions are surprisingly useful. They highlight moments where the AI misunderstands a point, oversimplifies something important, or surfaces a new angle I hadn’t considered. I often regenerate them as the draft evolves. NotebookLM recently added Infographic, Slideshow, and video-summary modes as well. Each one gives a different perspective on the material, and those alternate views sometimes point to refinements I wouldn’t have caught on my own.
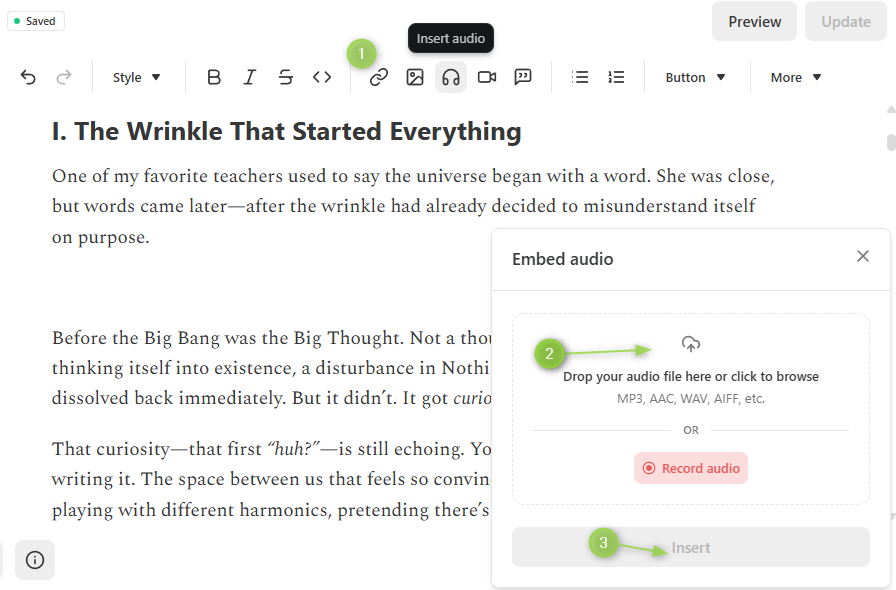
The AI podcast episodes can be downloaded and stored in the /audio/ folder mentioned in process step 7. below, and I use Podbean’s free tier (https://www.podbean.com/) to store these for the WordPress blog. On Substack, the downloaded AI podcast episode can simply be uploaded as audio file as such to be embedded directly within the post:
6. Archiving the Raw Version and Keeping Organized
When a draft starts feeling like it might become a real post—something destined for Substack or my WordPress blog—I set up a dedicated folder on my computer. On my Desktop I navigate to: Desktop → Blog → KindredSoulSearch → Posts and create a new folder named something like: ./12072025_TheSparkThatTurnedEmber/
The numbers represent a date. It might be the planned publication date, today’s date, or the day I first drafted the idea. It doesn’t matter much; it just keeps everything sorted chronologically and easy to scan in this ./Blog/KindredSoulSearch/Posts/ folder.
Inside this new folder, I create three subfolders:
- /images/
- /audio/
- /MP4/
And inside /MP4/, I add a final subfolder called /Delivery/ for whatever clips end up being used in the published version.
Microsoft Word: When I come back to the draft and feel ready to preserve its current state, I save it into this folder as a Word document with a version number—for example: TheSparkThatTurnedEmber_v0.1.docx
From here I might keep refining, or I might leave it as is. The versioning just ensures I can experiment freely without losing the original shape of the piece.
7. Image Generation and Visual Resonance
I rely on two image-generation tools regularly:
- ChatGPT’s older DALL·E model for all Día de los Muertos–themed images (https://chatgpt.com/g/g-2fkFE8rbu-dall-e)
- Google’s Nano Banana model (https://aistudio.google.com/models/gemini-2-5-flash-image) for everything else, preferring now aspect ratio 21:9 (e.g., the aspect ratio is the set of dimensions of the image, e.g., usually this is 16:9 for landscape, or 9:16 for portrait. 21:9 are extra-wide and I like how they display in full-width on Substack – see Example)
DALL·E gets a consistent, highly structured prompt. Nano Banana is more conversational—sometimes I just paste in a few sentences from the draft and see what it does with them.
Here’s the standard prompt I use for the Día de los Muertos images:
Create a professional-grade vibrant and clean widescreen HDR feature image in 4k UHD resolution with an abstract fusion art crossover style of ‘Asian Mythical Art’ and ‘Dia de los Muertos’ symbolism. Make it reminiscent of ancient, surreal aesthetics and ensure a professional and balanced composition. The image should be visually stunning and well-crafted, with optional professional photography elements such as lens flares and distance blur or focus. It must pop and make instant sense with a wow-factor. Sprinkle in some subtle Shamanic elements as well. Take your time. The object featured in the image should be the following: ###. The hue should be @@@.
The placeholder ### can be anything: an object description, a concept, or even a paragraph or two straight from the blog post. The placeholder @@@ is a simple color cue like “dark pink” or “light green.” and can also simply be deleted if not needed.
With both models, I usually find something usable within five generations. Occasionally the underlying text doesn’t give the AI much to latch onto, and that’s when tweaking the phrasing of the prompt helps steer the composition into useful territory.
Fixing Text and Typos in AI Images: I use https://www.photopea.com/ to edit images as needed, and within Photopea the technique is pretty repetitive, namely for example the Nano Banana logo in the bottom right corner can easily be removed with just three steps:
- Paste the image into Photopea (Ctrl+V)
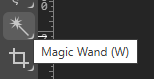
- Select the logo with the Magic Wand (W):

- Right-click the selection and choose Expand (by 5px)
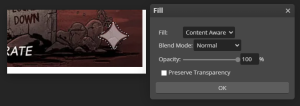
- Right-click again and choose Fill… → choose Content-Aware:

Logo gone. Save the file into the /images/ folder and move on to the next one.
Fixing typos is more hands-on. My approach remains simple:
-
Find a clean version of the missing letter elsewhere in the image
-
Isolate it with the magic wand
-
Paste it on a new layer
-
Adjust, blend, and use Content Aware Fill as needed to patch the area
I only bother when the image is otherwise fantastic. Fixing text in AI images remains a finicky, occasionally maddening experience—and I don’t recommend doing it unless the image truly earns your time.
I repeat this process until I have all the images I need saved in the /images/ folder for the draft. From there I edit the draft staged readily on Substack adding each image at the appropriate place in the essay.
8. Short-Form Video Creation (Sora2 Cameo Workflow)
Once the text and images are in place, the blog post can technically be published. But for certain pieces I also create a video version for my YouTube channel. I originally experimented with KlingAI, but Sora2 has been far simpler, faster, and free to use for a limited number of clips each day. The basic quota is generous enough: 15–30 clip generations depending on the day. Ten-second clips cost 1 credit, fifteen-second clips cost 2 credits, and you can usually generate up to three clips simultaneously.
Prompts can be as descriptive as you want. For example, all the “No Kings. No Billionaires.” protester clips come from a prompt like this:
A funny and witty “No Kings, No Billionaires” protester couple with her dressed as distinguished queen holding a ‘No Kings’ sign and him with a silver top hat and mustache resembling a flamboyant billionaire holding a ‘No Billionaires’ sign. The couple is holding up their signs with gold-glitter letters 7-inch tall on a purple handheld billboard walking with other whimsical protesters demonstrating on October 18, 2025. They swing and dance with their signs, and they both chant with opera fervor taking turns, him first: “Swing along, my queen, Let us taunt that libertine, ‘Til his blush is tangerine, When we release those files of… [he stops dancing, irritated] files of… of Jeff…how does it go again? [he looks at the queen and then the crowd cheers loudly] Epstein” as the rhythmic drums propel to march onward in this realistic and amateurish-looking scene.
For the Artimer’s Explainer video on ‘No Kings. No Billionaires.’ I rely on Sora2’s Cameo feature, which ensures consistent character appearance across multiple clips. If you’re unfamiliar with Cameos, this YouTube walkthrough explains it better than any documentation: https://www.youtube.com/watch?v=GYxdsHr8MOM
In practice, my standard prompt for Explainer clips is extremely simple:@nokingsnobillionaires.artimerwendel says verbatim: “<essay chunk>”.
I take one chunk at a time from the blog post, drop it into that prompt, and generate the corresponding clip. Once I’ve created and downloaded all the segments I need, I place them into the /MP4/ subfolder to keep the workflow clean. The only trickery here is that I simply ask ChatGPT to break down the entirety of a blog post draft (e.g., copy it from Substack and paste it back into ChatGPT) and ask it to dissect the draft into chunks of roughly 10 seconds verbally talking time and encapsulate each chunk with @nokingsnobillionairs.artimerwendel says verbatim: “. In fact, easier to just share the actual prompt:
Today I need you to chunk up the following into a downloadable Excel file prefixing each chunk with ‘@nokingsnobillionaires.artimerwendel says verbatim: “<chunk>”‘ replacing <chunk> with the actual text portion and balancing each chunk to fit roundabout a 10 to 15 second verbal recitation window of each segment/chunk. This means assume this essay is spoken aloud, and the chunks should roughly fill such time periods. Also replace the Roman numerals for each chapter headline with “Chapter <numeral>: <chapter header>”. Here is the essay: “Dreams, Dreamers and Awakening: The Pains and Suffering of Forgetting…
Step 9 below runs mostly in parallel to clip creation in Sora2, meaning while Sora2 generates, I may already have downloaded a good clip, imported it into DaVinci Resolve and cut it to fit.
9. Clip Assembly in DaVinci Resolve
DaVinci Resolve is a very deep program, and for the sake of keeping things simple for this guide, I only describe the bare process of stitching the Sora2 video clips together. Altogether though you also do not need to be an expert in DaVinci Resolve, and if any other video editing tools feel more organic to use, most certainly do so.
Download the program from BlackMagicDesign’s website here: https://www.blackmagicdesign.com/products/davinciresolve
Create a new project and you’ll see a blank workspace similar to this:
Rough Steps:
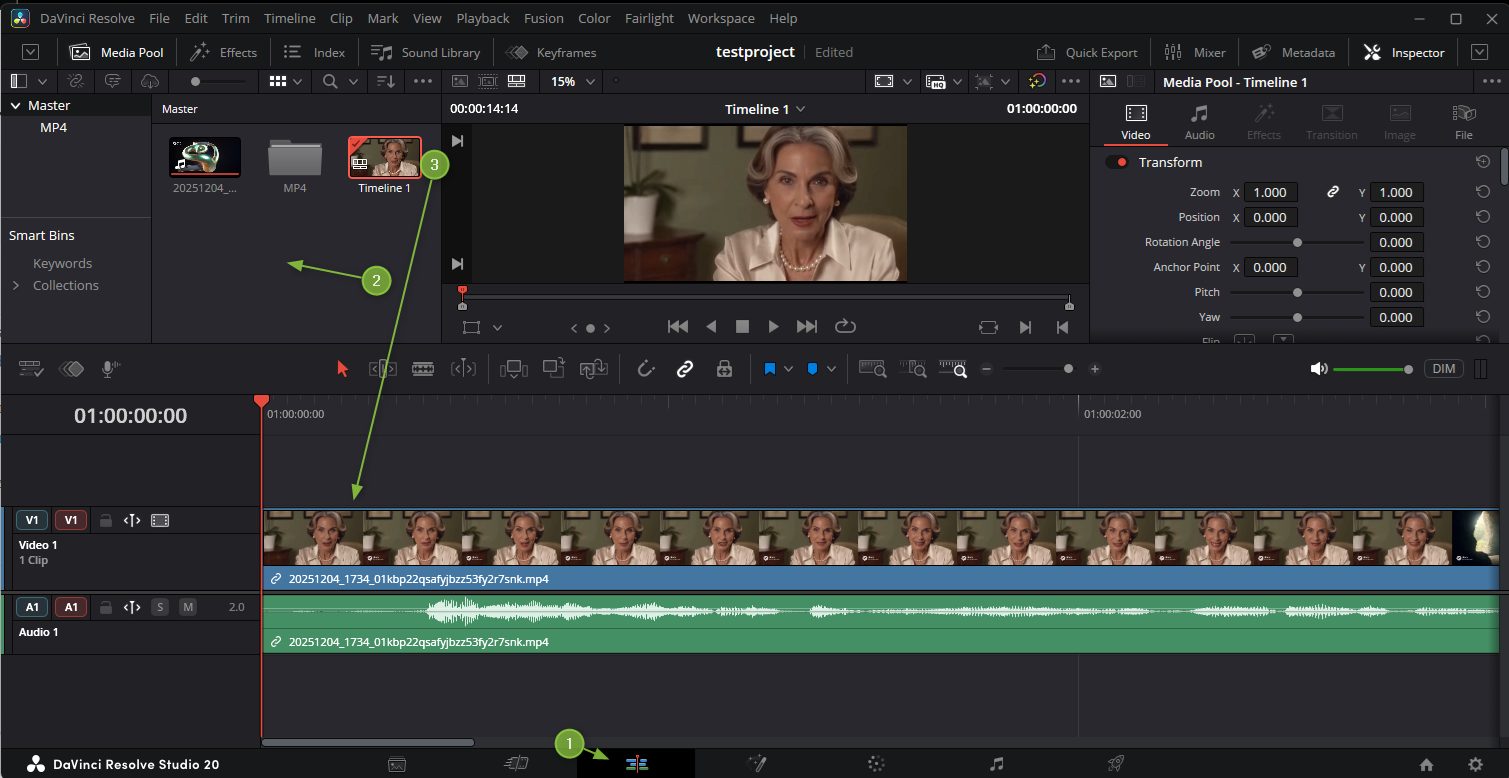
- Click on the ‘Edit’ pane
- Right click in the ‘Media Pool’ area and either create a ‘New Bin’ that is essentially a folder, or use the ‘Import Media’ functionality to link one of the Sora2 video clips into this Media Pool.
- Drag such clip down onto the timeline.
- Here now you can use DaVinci’s tools to cut and edit clips and produce sequentially the video you are after.
- Once the video has come together, use the ‘Deliver’ tab as shown below. The settings are of course up for anyone’s consideration, so I point out below just the settings I usually tweak before rendering:
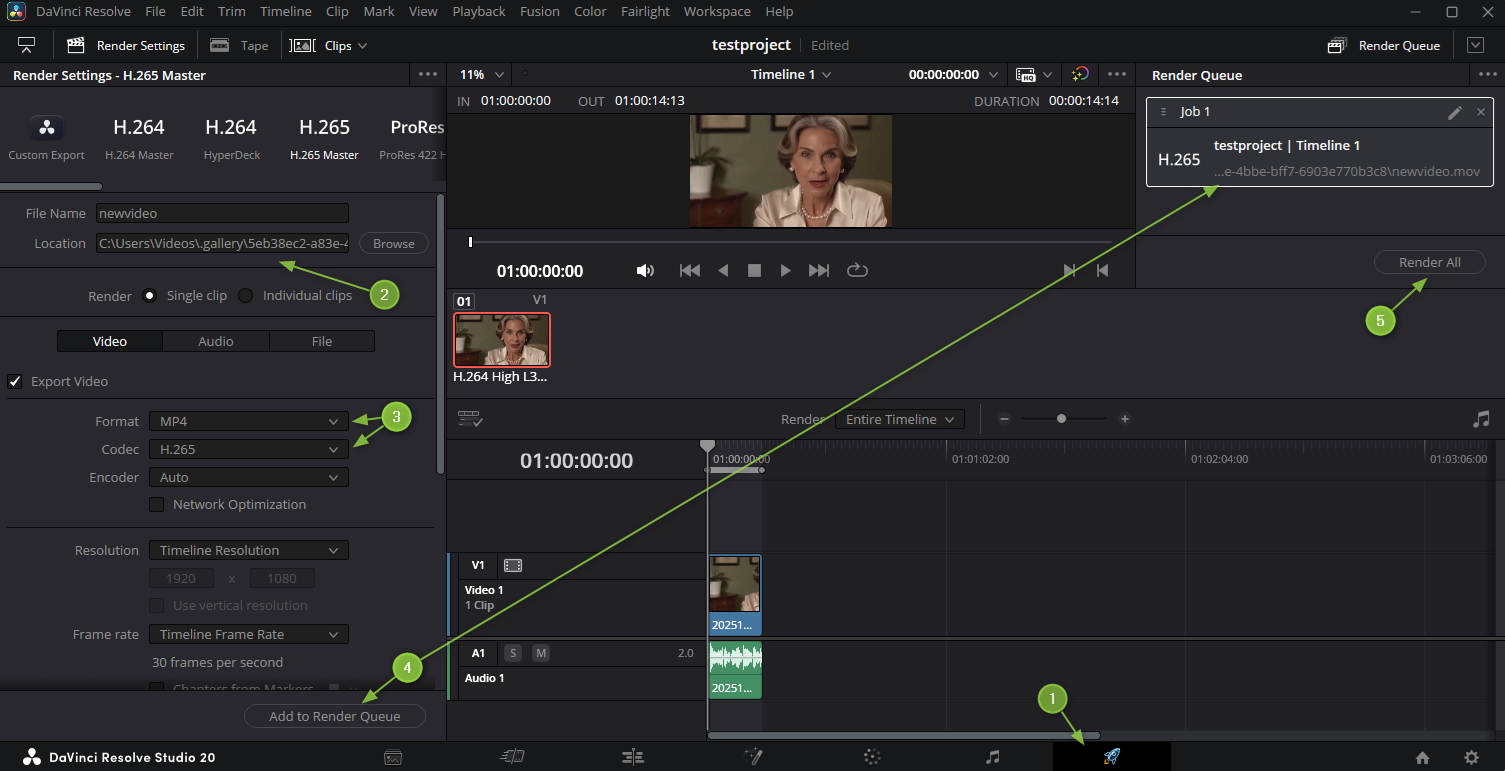
From here I upload videos to YouTube and add all the required fields such as title, description, tags etc.
10. Final Thoughts
After all this you may wonder where the human work began and the AI took over to the extent that it might feel wrong, questionable, or outright fraudulent to claim any artistic ownership for the published content. I am of course pondering this too, yet mainly I enjoy turning my fleeting thoughts into this format to simply last and become a place where I can revisit them. Any audience reaction would be cool too, of course, yet while there are plenty of Likes on YouTube, to date it’s been sparse to say the least to hear from any other real human being… so… if nobody cares about this anyways, why should I skip this fun hobby, and the occasional ‘This is AI slop!!’ is ignorant in any case.
A related long-form contemplation on this topic of authenticity with AI Art can also be found here: https://kindredsoulsearch.com/the-creatives-applause/